In this post, I will explain how to create a virtual host (web service + web portal) for setting up a Synology NAS web server.
The goal is to enable web services from the root folder of your Synology NAS when accessed via the domain address you’ve linked externally.
I will explain this step-by-step, so please follow along carefully.
From DSM version 7.2 onwards, the virtual host feature has been changed to web service + web portal.
Users who are using DSM version 7.2 or later should skip the virtual host creation steps below and follow the steps for creating a web service + web portal.
Creating a Virtual Host (For Users with DSM Version Prior to 7.2)
First, go to the [Virtual Host] menu in the Web Station of your Synology NAS and click the [Create] button.

Enter the domain (or subdomain) name for the virtual host, and check the ports 80 and 443.
Then, check the HSTS option in the HTTPS settings. (HSTS redirects an http input address to an https address.)
You can choose the desired version for the HTTP backend server and PHP.
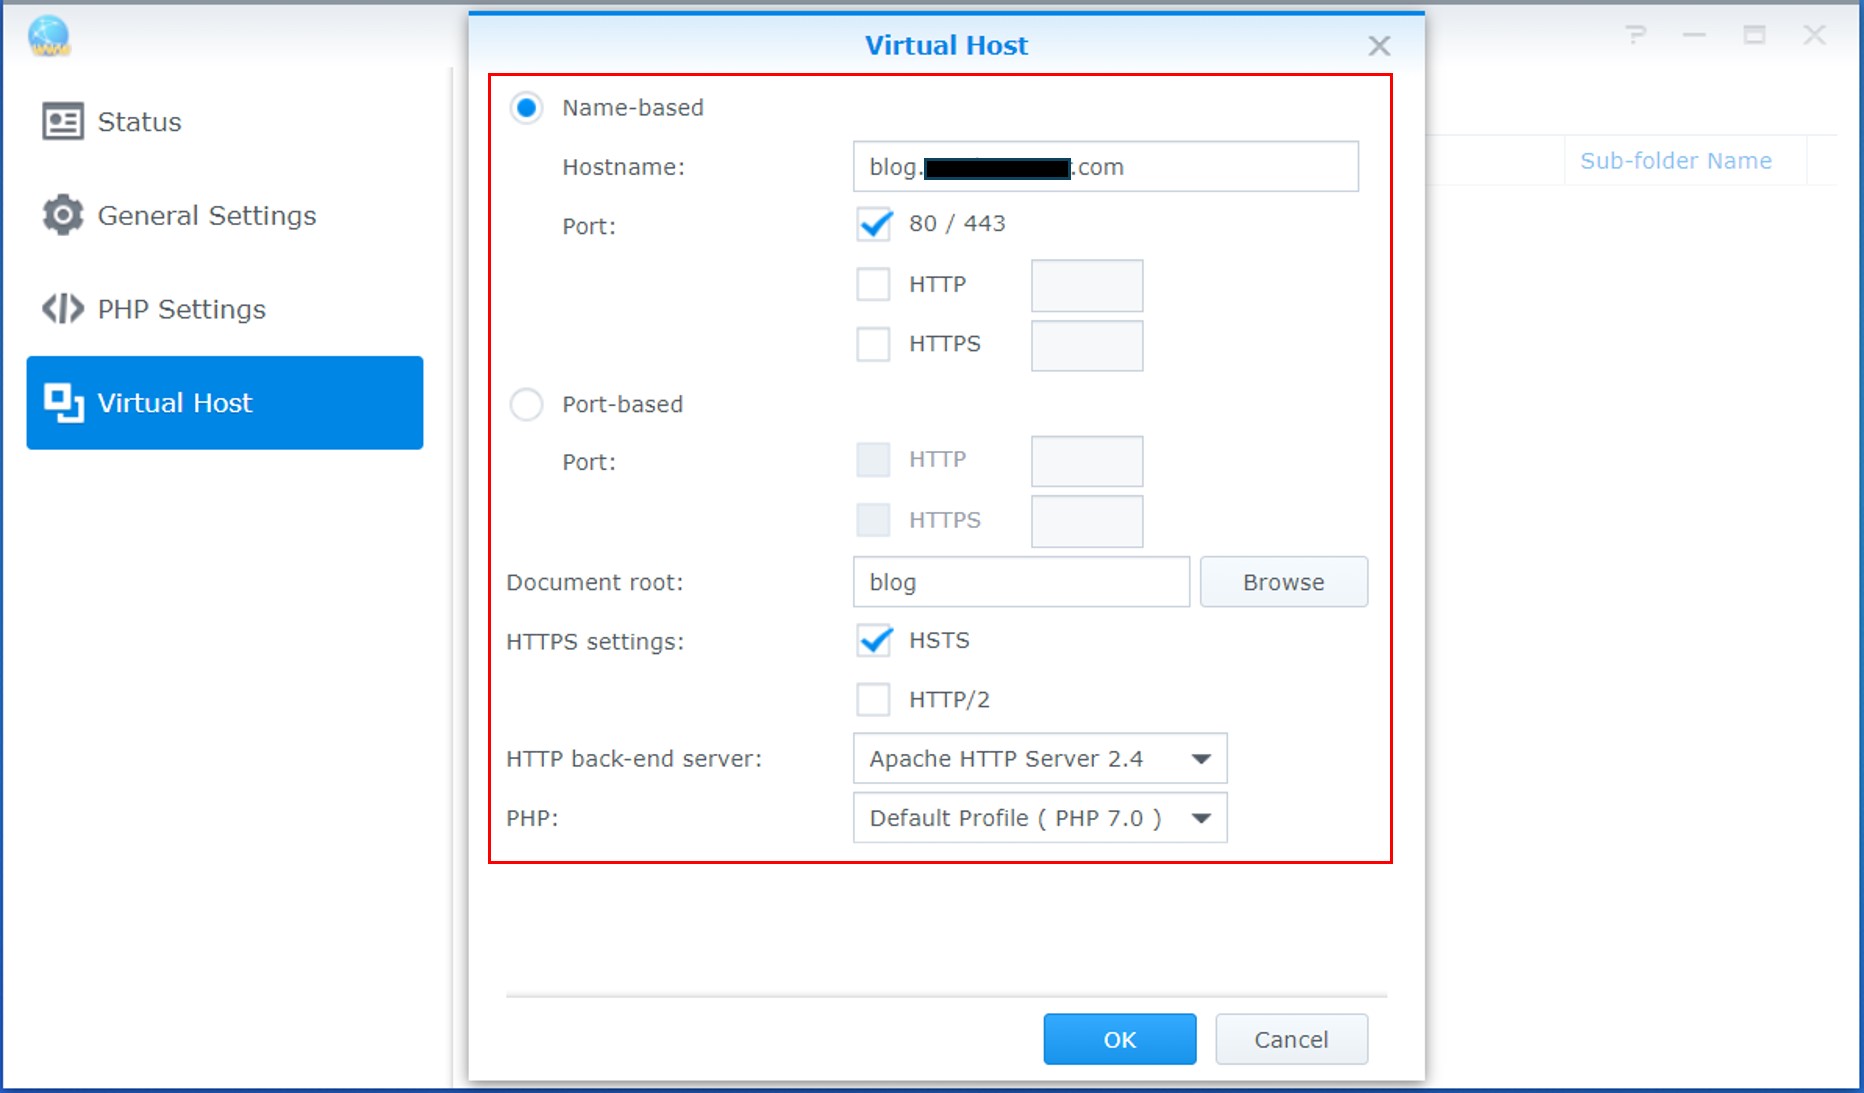

Check the created virtual host.

Up to this point, we have described the steps for creating a virtual host for users with DSM versions prior to 7.2.
Now, we will explain the steps for setting up web service + web portal for users with DSM 7.2 and later.
Creating Web Service + Web Portal (For Users with DSM 7.2 and Later)
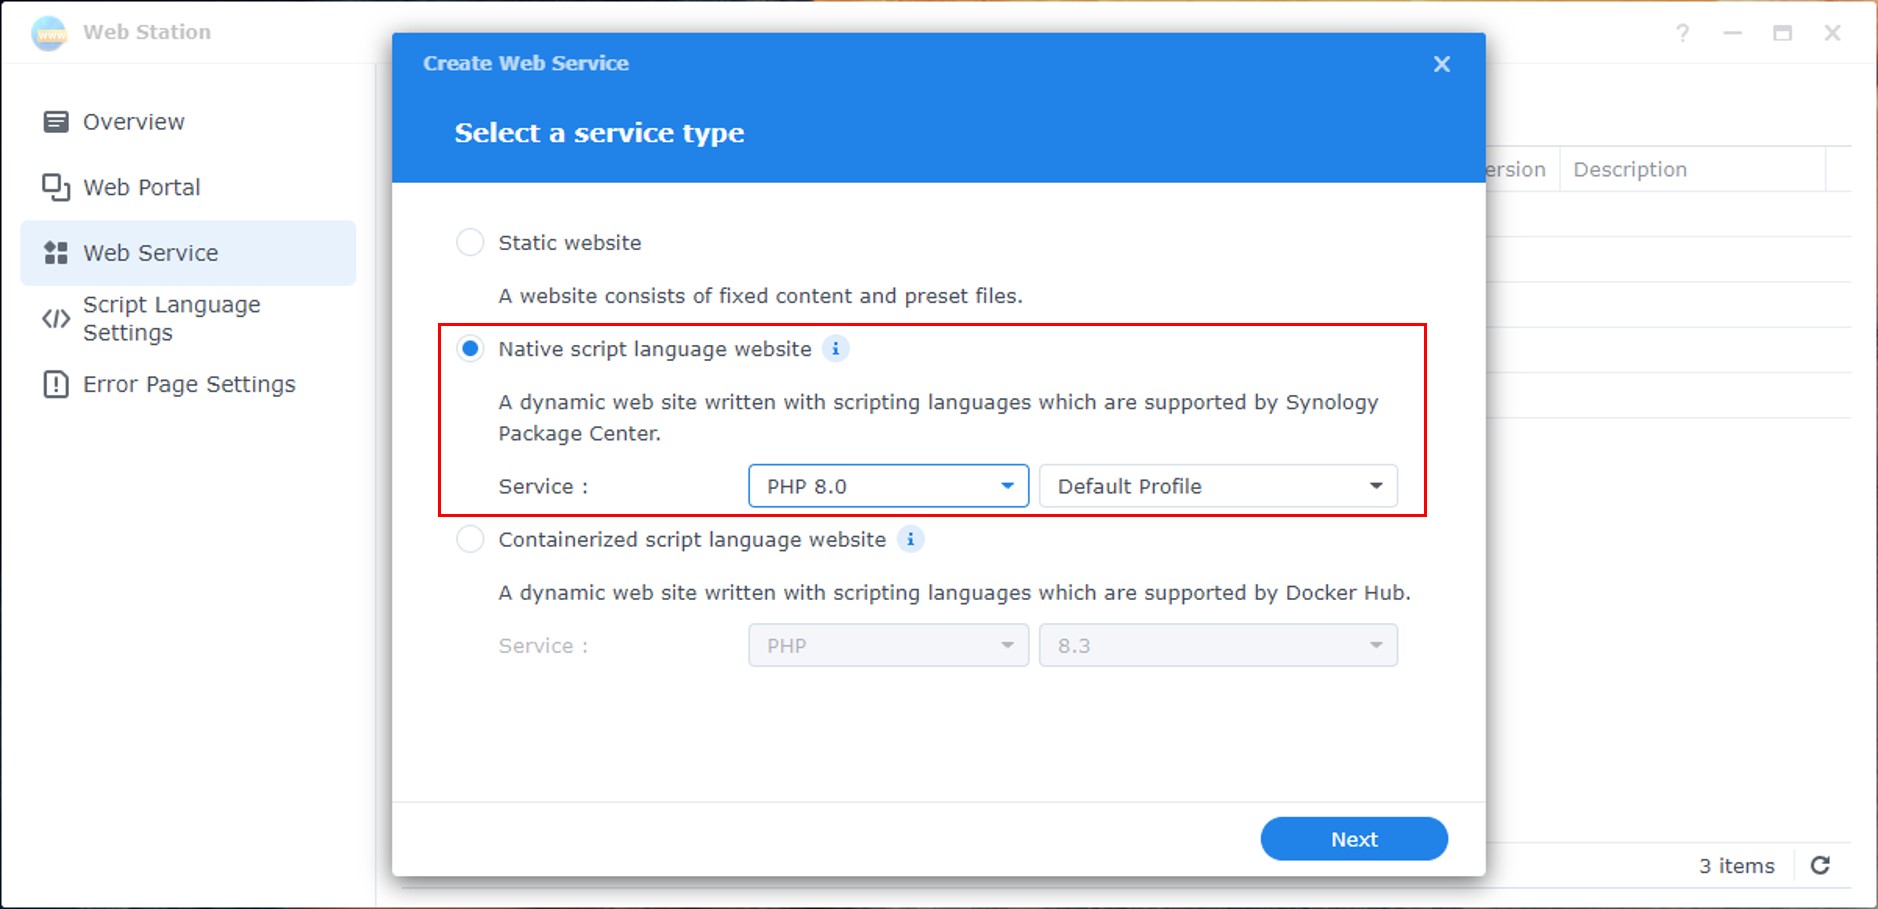
First, navigate to the [Web Services] menu in Synology NAS’s Web Station, then click on the [Create] button.

Select the service type as [Native script language website], and choose the desired PHP version for the service.
In the general configuration, enter the web service name and description.
For the document root, click the [Browse] button to select the shared folder created in the previous post, setting it as the root folder.
Choose the desired HTTP server version for the HTTP backend server.

Confirm the web service settings that have been configured so far.


Confirm the created web service.

Next, go to the [Web Portal] menu in Synology NAS’s Web Station, then click on the [Create] button

For the portal type, select the web service portal type.

Configure the Web Service Portal. Select the service as the web service created earlier, enter the domain (or subdomain) in the hostname field, and check the ports 80/443.
Additionally, check the HSTS option in the HTTPS settings. (HSTS redirects an http input address to an https address.)

Confirm the created web portal.

If you have followed NAS Web Server Setup Step 1 (Domain Connection), NAS Web Server Setup Step 2 (Root Folder Creation), and NAS Web Server Setup Step 3 (Virtual Host or Web Service + Web Portal Creation) successfully, now when you access your connected domain address from an external source, it should lead to your Synology NAS and run the web service from the specified root folder.
However, currently, if you access your connected domain address, you will encounter the following warning:

‘This site is not using HTTPS,’ indicating that HTTPS is not applied.
The following post will cover the Synology NAS Web Server Building Step 4 – Certificate Creation.
Let’s create a certificate and transform the site into a secure one when accessed through my connected domain address.
Synology NAS Web Server Building Step 4 – Certificate Creation
The end of the day is a precious moment to take a break and prepare for the powerful steps towards tomorrow.
Close your eyes for a moment, let go of today’s fatigue and dream of today and another new tomorrow.
Just like how the dawn always follows the sunset, our path will also brighten again.
Tomorrow will come with better opportunities and hope. Keep going!
Pingback: Synology NAS Web Server Building Step 2 – Root Directory Creation – NEEDS MEETER